Cabinets updated for this decade

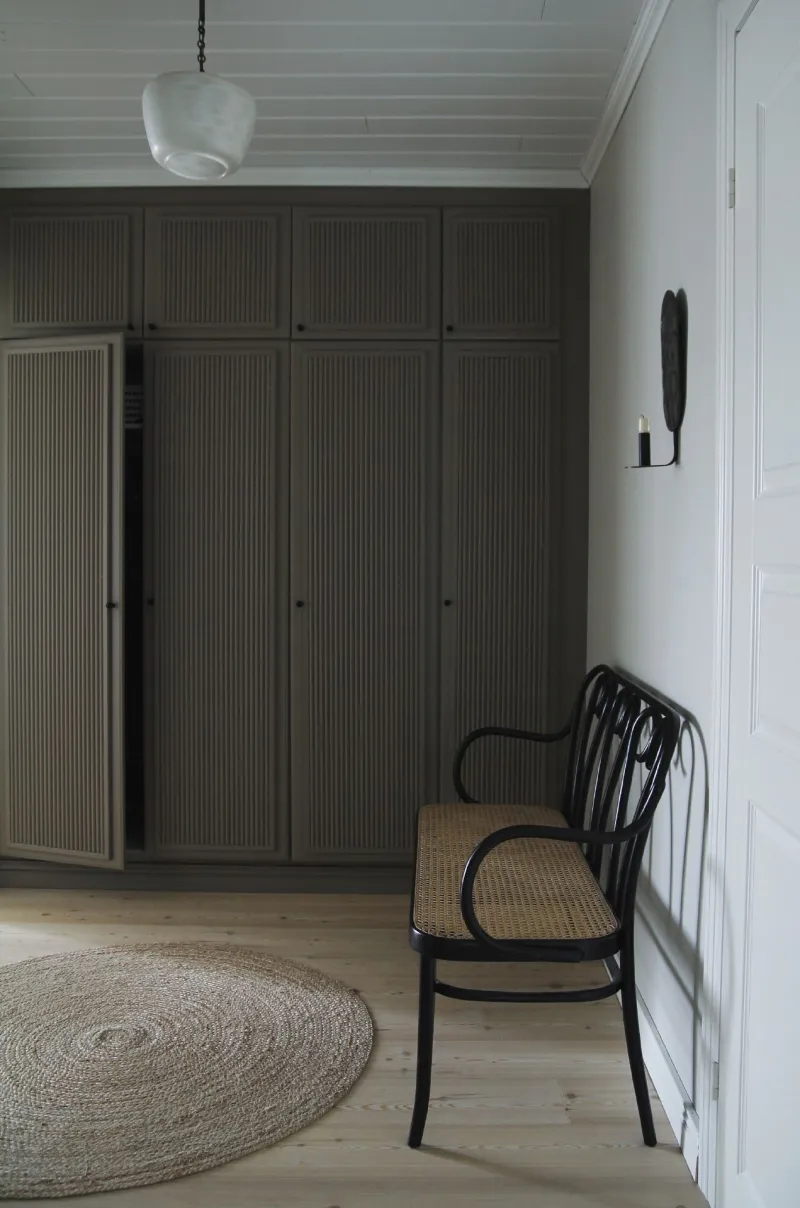
The cabinet doors that were more than ten years old needed a facelift and modernization. Maiju form the Maiju Saw blog came up with the idea of covering the panel grooves with new paneling and painting the cabinets in a medium brown that gives the space warmth. Recycling the old cabinets to create storage for the hall helped make use of the extra space in the walkway. After all, we could always use more storage space!
For the cabinets, Maiju chose Helmi 10 Furniture Paint that was tinted to colour S483 from the Symphony colour card. The warm medium brown is very close to the popular colour S484 Conglomerate in the Feel the Color collection. The new imposing yet subdued look of the cabinets creates a sense of drama to the hall while the consistent shade provides a harmonious wall surface. Initially, Maiju had used lighter shades in her family home but with this project, she wanted to bring more depth and warmth to the colour scheme. The shade of brown Maiju selected is slightly tinted to gray, making it a beautiful addition to the mood of the old house.
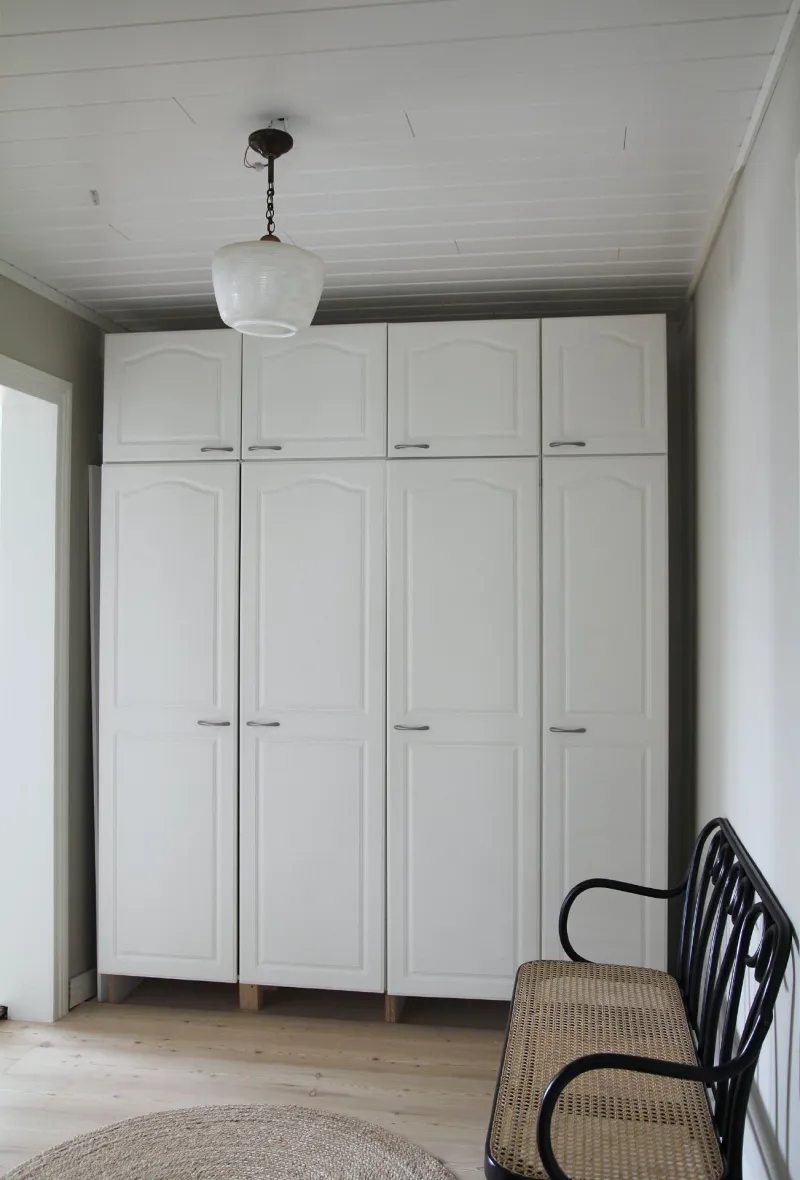
It would have been a shame to throw away the frames and doors of the cabinets, as they were, in fact, in good condition. With a little woodwork, the cabinets were given a new lease on life, and modernizing old furniture is also good for the planet!
The renovation of cabinet doors begins with a little woodwork. With the right tools and precise measurements, success is guaranteed! Allow plenty of time for the wood glue and the coats of paint to dry. The change in the cabinets is incredible; the end result will certainly reward a careful decorator!
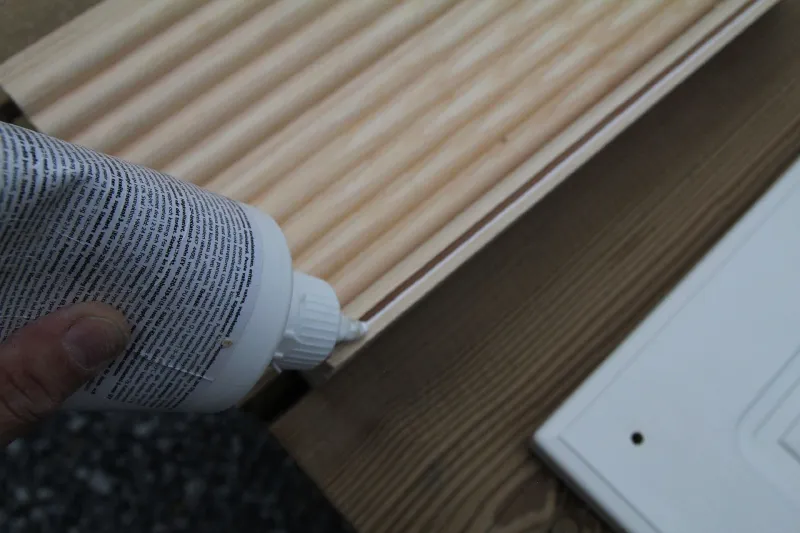
1. PANELING
Remove the doors from the frames. Cut the panels to the desired size and attach to the doors with a wood glue.
Put weights on top of the doors while the glue dries. If you wish, you can secure the panels with screws on the back of the door.
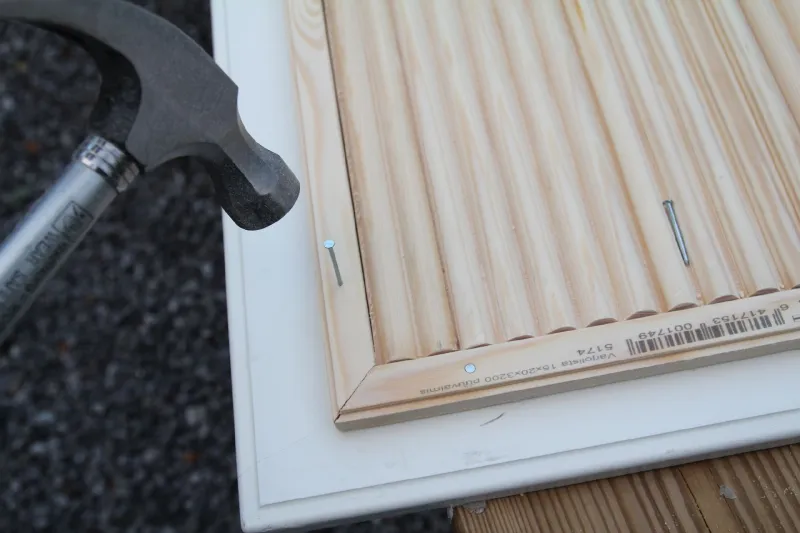
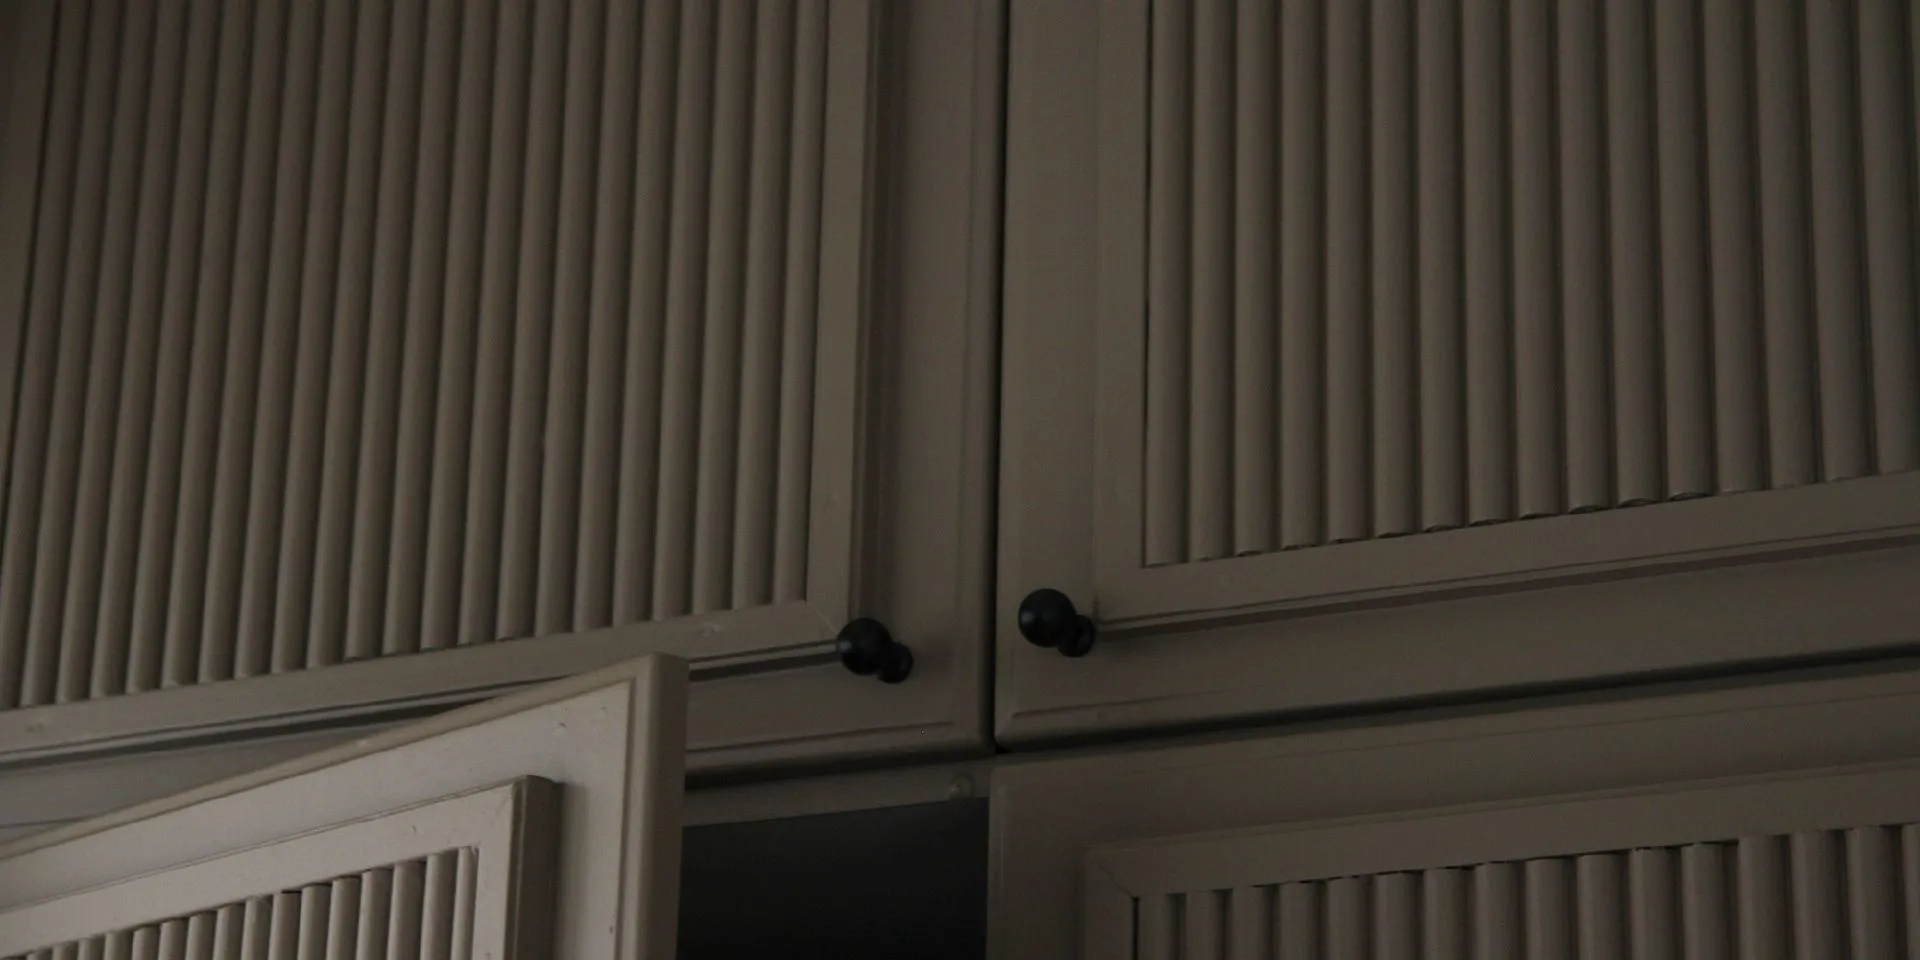
2. FRAMING
Saw strips of wood to go around the panels to cover the ends. Attach the strips with small nails.
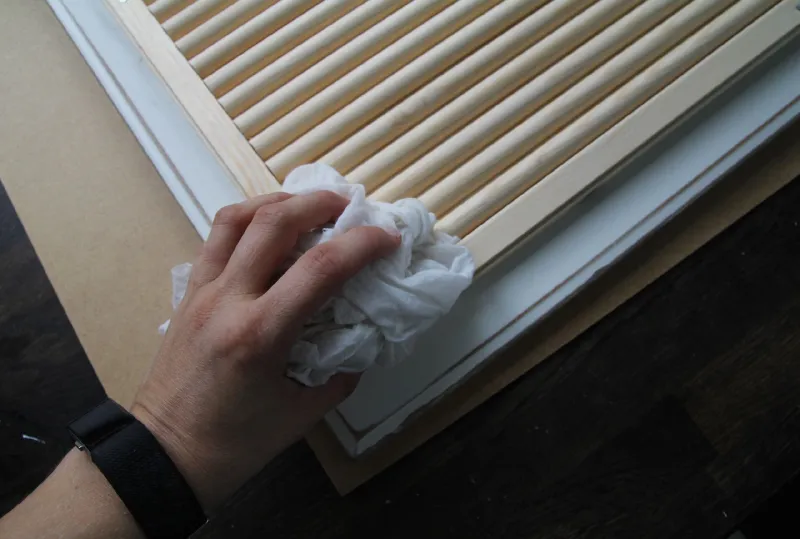
3. CLEAN THE SURFACE
To prepare the surface for painting, clean it with Tikkurila Kalustepesu cleaning agent.
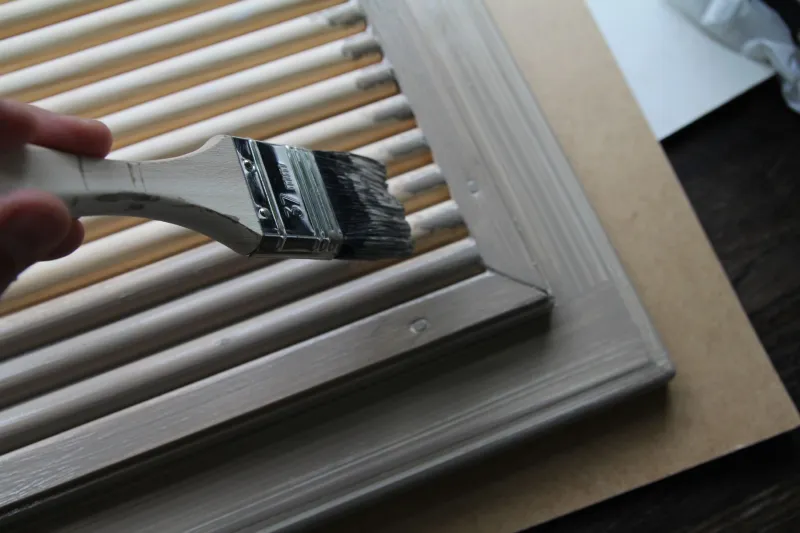
4. PAINT
Prime the doors with Helmi Primer. You should tint the primer to the shade of the topcoat. Once the primer has dried, paint the doors once or twice with Helmi 10 Furniture Paint. It is easiest to use a furniture roller on the back of the door. Use a brush on the front to give the panels a smooth finish.
The cover plates that surround the wardrobes were ordered from a joinery sawn to size. After attaching the plates, they were painted in the same shade as the cabinets. New handles and skirting boards finished off the hall!

Idea implemented by: Maiju Saw
MAIJU SAW is an interior decoration blog whose author shares decorating ideas, DIY tips and inspiring pictures of her own home. Maiju presents her charming shopping finds, adorable flea market discoveries and stunning homemade creations. In addition, the blog also features lots of recipes and reflections on everyday family life with children.

